Category: Personal Finance | Money Management
UPI makes everyday payments simple, but it also makes spending easy to overlook. A ₹40 tea, ₹120 snack, ₹250 grocery purchase and ₹199 online order may seem insignificant individually. Together, these transactions can consume a noticeable part of your monthly budget.
If you want to learn how to track UPI expenses, start by reviewing your payment history, matching transactions with your bank statement, categorising purchases and calculating your total spending every month.
You do not need an expensive budgeting application. A notebook, Excel sheet or Google Sheets tracker can work.
This guide explains seven practical steps to monitor UPI spending, avoid double-counting transactions and build a monthly expense tracking habit.
Table of Contents

What Is UPI Expense Tracking?
UPI expense tracking is the process of recording, organising and reviewing payments made through the Unified Payments Interface.
UPI is a payment system developed by the National Payments Corporation of India (NPCI). It enables transfers between bank accounts and supports everyday payments to individuals and merchants.
For budgeting purposes, UPI expense tracking means identifying how much money you spend, where it goes and which purchases are necessary.
For example, you may use UPI to pay for:
- Groceries and vegetables
- Tea, coffee and snacks
- Restaurant meals
- Mobile recharges
- Electricity bills
- Transport and fuel
- Online shopping
- Subscriptions
- Household purchases
The challenge is that payment histories show transactions, but they do not always organise them into meaningful household budget categories.
A monthly expense tracker solves this problem.
How to Track UPI Expenses in 7 Simple Steps
The most practical way to track UPI expenses is to collect your transactions, identify actual spending, assign categories, calculate totals and compare the results against your budget.
Follow these seven steps.
Step 1: Check Your UPI Transaction History
Start with the payment applications you regularly use.
These may include Google Pay, PhonePe, Paytm, BHIM or your bank’s UPI application.
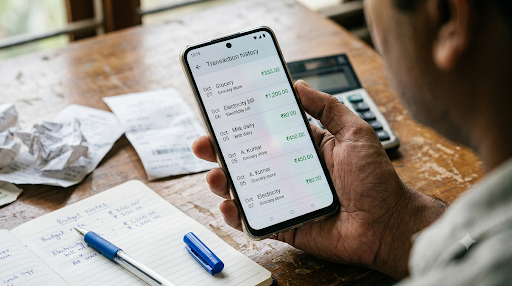
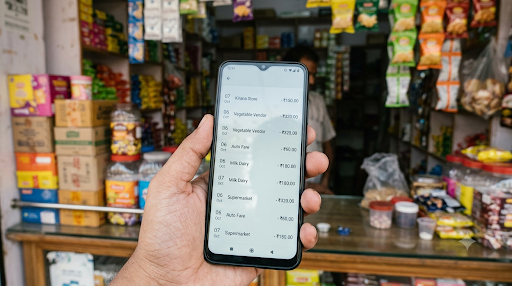
Most UPI applications provide transaction history showing details such as the payment amount, recipient, date and status.
How to check Google Pay transaction history
- Open Google Pay.
- Find the “See transaction history” option.
- Open your payment history.
- Apply the available date filters.
- Review your completed payments.
- Open individual transactions when you need additional details.
Google Pay also provides an option to obtain a transaction statement for a selected period.
How to check PhonePe transactions
- Open the PhonePe application.
- Go to the History section.
- Review payments made during the month.
- Open individual transactions to inspect their details.
- Note the payments that represent actual expenses.
The available options can vary by application version.
Important: An individual UPI app may not show payments made through another app. If you use multiple payment applications, check each one.
https://www.npci.org.in/product/bhim
Step 2: Download Your Monthly Bank Statement
Your bank statement provides an important second record of UPI transactions made through your bank account.
This becomes particularly useful when you use several UPI applications connected to the same account.
To review your monthly statement:
- Open your bank’s official mobile banking application or internet banking website.
- Select the relevant account.
- Find the account statement option.
- Choose the first and last dates of the month.
- Download the statement in an available format.
- Identify UPI-related debit entries.
Repeat this process for every bank account you use for spending.
Why bank statements matter
Suppose you pay ₹300 through Google Pay and ₹500 through PhonePe using the same bank account.
Both payments may appear in your bank statement.
If you add the app histories and the bank statement together without checking for duplicates, you could incorrectly record ₹1,600 instead of ₹800.
Use the bank statement as a reconciliation record, not as an additional spending category.
Match the date, amount and transaction reference where available.
Google Pay’s official guidance also recommends matching UPI transaction details with the corresponding bank statement.
[EXTERNAL LINK: Google Pay bank statement verification → https://support.google.com/pay/india/answer/16919844]
Step 3: Create Monthly Spending Categories
A transaction list becomes useful when you understand what each payment represents.
Start with a small number of categories.
| Category | Example Payments |
|---|---|
| Groceries | Vegetables, milk, household food |
| Food & Drinks | Tea, snacks, restaurants |
| Transport | Fuel, auto, bus |
| Bills | Electricity, internet, mobile |
| Shopping | Clothes, accessories |
| Health | Pharmacy, consultations |
| Entertainment | Movies, streaming |
| Other | Unclassified purchases |
Avoid creating too many categories initially.
For example, separate categories for tea, coffee, biscuits and bakery items may make tracking unnecessarily complicated.
You can combine them under Food & Drinks.
Practical tip: Classify spending based on what you purchased, not only the recipient’s name.
A payment to a supermarket may contain groceries and personal-care products. You can either use the dominant category consistently or split the transaction when the receipt provides enough detail.
Step 4: Record Transactions in Excel or Google Sheets
A spreadsheet is one of the easiest ways to maintain a monthly UPI expense tracker.
Create the following columns:
| Date | Description | Category | Amount |
|---|---|---|---|
| 01 Oct | Milk | Groceries | ₹60 |
| 01 Oct | Tea | Food & Drinks | ₹20 |
| 02 Oct | Auto fare | Transport | ₹120 |
| 02 Oct | Lunch | Food & Drinks | ₹150 |
| 03 Oct | Mobile recharge | Bills | ₹299 |
| 03 Oct | Vegetables | Groceries | ₹180 |
| Total | ₹829 |
Illustrative transactions, not actual consumer spending data.
You can add optional columns for payment application, bank account, transaction reference and notes.
For a simple Excel sheet:
- Column A: Date
- Column B: Description
- Column C: Category
- Column D: Amount
Enter this formula to calculate the total:
=SUM(D2:D1000)
If you record only genuine expense amounts in Column D, the formula adds those entries.
To calculate spending for a specific category, use:
=SUMIF(C2:C1000,"Groceries",D2:D1000)
This calculates the total for rows labelled Groceries.
Important: Keep transfers, refunds and income separate from actual spending. Otherwise, your total may be misleading.
[INTERNAL LINK: Monthly Expense Tracker in Excel for Beginners]
Step 5: Separate Actual Expenses From Money Transfers
Not every UPI debit represents consumption.
Consider these transactions:
| Transaction | Amount | Treatment |
|---|---|---|
| Grocery purchase | ₹700 | Expense |
| Transfer to own bank account | ₹2,000 | Internal transfer |
| Restaurant payment | ₹350 | Expense |
| Transfer to own savings account | ₹1,500 | Savings transfer |
| Shopping refund received | ₹200 | Refund adjustment |
In this example, your gross spending is ₹1,050.
If the ₹200 refund relates to an expense included in the same reporting period, your net spending becomes ₹850.
Moving ₹2,000 between your own accounts does not mean you spent ₹2,000.
Similarly, transferring ₹1,500 to your savings account changes where your money is held but is not ordinary consumption spending.
Money sent to another person needs context. Rent paid to a landlord is an expense, while transferring money to your own account is not.
A useful rule: Track the purpose of a payment before deciding whether it belongs in your spending total.
Step 6: Set a Monthly UPI Spending Budget
Once you understand your transactions, decide how much you want to spend in each category.
Suppose your monthly take-home salary is ₹25,000.
You might create the following illustrative budget:
| Category | Monthly Budget |
|---|---|
| Rent | ₹7,000 |
| Groceries | ₹3,500 |
| Food & Drinks | ₹1,500 |
| Transport | ₹2,000 |
| Bills | ₹1,500 |
| Personal Shopping | ₹1,000 |
| Health & Miscellaneous | ₹1,500 |
| Savings | ₹5,000 |
| Emergency Buffer | ₹2,000 |
| Total | ₹25,000 |
This is only an example. Actual allocations depend on rent, family responsibilities, debt repayments, location and personal needs.
Your UPI spending budget should cover categories you actually pay through UPI.
For instance, if you pay rent using a bank transfer outside your UPI applications, it still belongs in your household budget, but not necessarily in your UPI spending total.
Compare your actual category expenses with the planned amounts.
If you budget ₹1,500 for food and spend ₹2,100, you have exceeded that category by ₹600.
This information helps you decide what to adjust next month.
[INTERNAL LINK: How to Save Money on a ₹25,000 Salary]
Step 7: Review Your UPI Expenses Every Week and Month
Do not wait until the end of the month to discover that you have overspent.
A short weekly review makes the process easier.
Weekly review
- Check recent UPI payments.
- Record missing transactions.
- Assign spending categories.
- Verify unusual amounts.
- Compare actual expenses with your budget.
Monthly review
At the end of the month, calculate:
- Total UPI spending.
- Spending by category.
- Largest individual expenses.
- Budget overruns.
- Refunds and reversals.
- Differences between app records and bank statements.
Then choose one or two spending habits to improve.
For example, reducing unnecessary food delivery orders may be more realistic than trying to eliminate every small purchase.
Consistency matters more than creating a complicated system.
Monthly UPI Expense Tracker Example
Here is a simplified example showing how one person might analyse a month of UPI payments.
| Expense Category | Monthly Spending |
|---|---|
| Groceries | ₹3,200 |
| Food & Drinks | ₹2,400 |
| Transport | ₹1,600 |
| Shopping | ₹1,800 |
| Bills | ₹1,500 |
| Entertainment | ₹900 |
| Other | ₹600 |
| Total | ₹12,000 |
Illustrative example only.
The biggest category is groceries at ₹3,200.
However, food and drinks, shopping and entertainment together account for ₹5,100.
This does not automatically mean these expenses are wasteful. It indicates where a closer review may be useful.
If the person decides to reduce these three categories by a combined ₹1,000 next month, their spending target would fall from ₹12,000 to ₹11,000, assuming other categories remain unchanged.
That is the real benefit of tracking expenses: making decisions based on recorded behaviour rather than memory.
How to Track UPI Expenses Without Excel
Not everyone wants to maintain a spreadsheet.
There are three practical alternatives.
1. Use a Notebook
Write down each UPI purchase with its date, category and amount.
Add the totals at the end of the week.
This approach is suitable for people who prefer manual tracking or have relatively few transactions.
2. Use Google Sheets on Your Phone
Google Sheets allows you to maintain a spreadsheet from your mobile device.
You can create a simple table, enter expenses after payments and review category totals.
It is especially useful if you want access from more than one device.
3. Use a Budgeting Application
Some budgeting applications offer spending categories, charts, reminders and transaction-import features.
Before choosing an app, review its privacy policy, permissions, data handling and pricing.
Avoid granting unnecessary access to SMS messages, contacts or sensitive financial information.
A budgeting application does not need your UPI PIN to analyse manually entered expenses.
How to Identify Small UPI Expenses That Add Up
Small payments can become difficult to notice because they rarely feel significant individually.
Consider this illustrative daily spending pattern:
| Purchase | Daily Amount |
|---|---|
| Tea | ₹20 |
| Snacks | ₹40 |
| Extra food purchase | ₹60 |
| Daily Total | ₹120 |
If the same pattern occurs on 25 days, the total becomes ₹3,000.
This does not mean you should stop buying tea or snacks.
Instead, identify whether those purchases fit your priorities and budget.
A helpful approach is to calculate spending frequency.
Ask yourself:
- Which merchants receive payments most often?
- Which expenses repeat several times a week?
- Are there subscriptions I no longer use?
- Which purchases were planned?
- Which purchases could be reduced without affecting essential needs?
These questions help reveal habits that a simple transaction total may miss.
How to Handle Refunds, Failed Payments and UPI Lite
Accurate tracking requires more than adding every outgoing payment.
Refunds
If you receive a refund for an earlier purchase, record it separately and link it to the original transaction.
For monthly reporting, decide whether you will adjust the original month’s expense or show the refund in the month received.
Use the same method consistently.
Failed or Pending Payments
Do not automatically treat every pending or failed payment as a completed expense.
Check the transaction status and your bank statement.
If money was debited and later reversed, record both entries so the final total reflects the actual outcome.
UPI Lite
UPI Lite transactions require particular care.
Funding a UPI Lite balance is not necessarily the same as spending that amount.
If you transfer ₹1,000 into UPI Lite and later make ₹300 in purchases, counting both the ₹1,000 funding and the ₹300 purchase as expenses would double-count part of the money.
Track the actual purchases and treat balance funding as a transfer.
Review the transaction records available in your UPI application, including the UPI Lite history where supported.
Common Mistakes When Tracking UPI Expenses
Mistake 1: Counting Every Debit as Spending
Transfers between your own accounts, savings movements and some balance top-ups are not purchases.
Separate them before calculating totals.
Mistake 2: Checking Only One UPI Application
If you use Google Pay, PhonePe and a banking app, one application’s history may not contain everything.
Review all relevant accounts and applications.
Mistake 3: Ignoring Cash Purchases
A UPI tracker measures digital spending through UPI.
It does not automatically provide your complete household budget.
Include cash, card and other payment methods in your broader monthly expense tracker.
Mistake 4: Forgetting Refunds
Refunds can make gross spending different from net spending.
Record adjustments instead of deleting the original transactions.
Mistake 5: Tracking Without Reviewing
Recording transactions is only the first step.
Reviewing categories and comparing them with your budget is what makes the information actionable.
Mistake 6: Sharing Sensitive Financial Details
Do not share your UPI PIN, OTP or banking passwords with budgeting apps or people claiming to help organise your expenses.
Use official banking channels when verifying transactions.
The National Payments Corporation of India advises users not to share their UPI PIN.
[EXTERNAL LINK — DOFOLLOW: NPCI UPI FAQs → https://www.npci.org.in/what-we-do/upi/faqs]
A Simple 10-Minute Monthly UPI Review Routine
You can make UPI expense tracking manageable by following this routine at the end of every month.
Minutes 1–3: Collect transactions
Open your UPI applications and bank statements. Gather records for the same date range.
Minutes 4–5: Remove duplicates
Identify transfers, repeated entries and transactions that are not actual expenses.
Minutes 6–7: Categorise spending
Group purchases into groceries, food, transport, bills, shopping and other relevant categories.
Minutes 8–9: Calculate totals
Find your overall spending and the categories where you exceeded your budget.
Minute 10: Set next month’s priorities
Choose one realistic spending adjustment.
This routine is a target, not a guarantee. If you have many transactions or unresolved payment issues, reconciliation may take longer.
Final Takeaway: Make Every UPI Payment Visible
Learning how to track UPI expenses does not require sophisticated financial software.
Start by checking your payment histories and bank statements. Record actual purchases, categorise them and review the totals regularly.
The most important step is avoiding misleading calculations. Transfers between your own accounts, refunds, pending payments and UPI Lite balance funding should not automatically be treated as purchases.
A simple monthly tracker can help you recognise spending patterns, plan your budget and make more informed financial decisions.
Start with your most recent month’s transactions. Once you understand where your money went, planning the next month becomes much easier.
Frequently Asked Questions
1. How can I track all my UPI expenses in one place?
You can track UPI expenses in one place by collecting transaction records from your UPI applications and bank accounts, then entering actual purchases into Excel or Google Sheets. Use categories such as groceries, food, transport and bills. Remove duplicate entries and exclude transfers between your own accounts.
2. Can I check my total monthly UPI spending on Google Pay?
Google Pay provides transaction history, date filters and a statement download option. You can use these records to review your monthly payments. However, Google Pay history does not include every payment made through other UPI applications. For a complete picture, also check your bank statements.
3. How do I track PhonePe expenses every month?
Open PhonePe and navigate to the History section. Review transactions for your selected month, identify completed purchases and record their amounts and categories in a budget tracker. Compare the records with your bank statement to identify missing transactions or discrepancies.
4. What is the best free method to track UPI expenses?
A basic Google Sheets or Excel tracker is a practical option if you already have access to the software. Record the date, description, category and amount for each purchase. Use SUM and SUMIF formulas to calculate monthly totals and category-wise spending without depending on automatic bank-data access.
5. Should I count money transferred to friends as an expense?
It depends on the purpose. Money paid to a friend for your share of dinner is an expense. Money lent to a friend is better recorded as a loan or receivable until its status changes. Transfers between your own bank accounts should not be counted as consumption spending.
6. Can I automatically track UPI expenses from multiple applications?
Some budgeting services offer transaction imports or automated categorisation, but coverage and permissions vary. There is no guarantee that one application will automatically capture every UPI transaction across all banks and payment apps. Bank statement reconciliation remains a useful way to verify your monthly totals.